
Gua sha has surged in popularity as an accessible at-home practice designed to support facial lymphatic drainage and enhance skin radiance when performed with care and science-informed technique. This guide lays out a comprehensive, evidence-informed protocol you can follow regularly, with practical guidance on tool selection, stroke cadence, safety, and how to achieve a safe, visible glow.
What is Gua Sha and why facial lymphatic drainage matters?
Gua sha uses a smooth-edged tool to glide along the skin, aiming to stimulate superficial microcirculation and lymphatic flow. While more research specific to gua sha is ongoing, related studies on facial massage and manual lymphatic drainage suggest benefits such as reduced puffiness, improved skin coloration, and a more even appearance when the technique is performed correctly and with proper hygiene.
Key concepts to keep in mind:
- Gentle, non-aggressive strokes minimize tissue trauma while supporting drainage.
- Drainage benefits come from moving fluids toward regional lymph nodes (jawline and neck regions) rather than tugging at the skin.
- Consistency matters: short, regular sessions often yield better results than rare, intense sessions.
Below, you’ll find a science-informed protocol designed for beginners and seasoned users alike, with practical notes on safety and expectations.
Science-backed protocol for at-home use
Before you start, ensure you’re in a clean, comfortable space, your hands and tool are sanitized, and you have a light amount of facial oil or moisturizer to reduce drag. The goal is to facilitate smooth gliding, not to exert heavy pressure.
-
Prep and hygiene
- Wash hands and cleanse the face to remove makeup, oils, and debris.
- Sanitize the gua sha tool with soap and water, then pat dry. Some users prefer a quick wipe with a 70% isopropyl alcohol solution between uses—allow to fully dry before the next pass.
-
Skin prep and lubrication
- Apply a light layer of facial oil, serum, or moisturizer to create a smooth glide. Avoid using gua sha on bare, dry skin, which can cause drag and micro-tears.
-
Tool selection
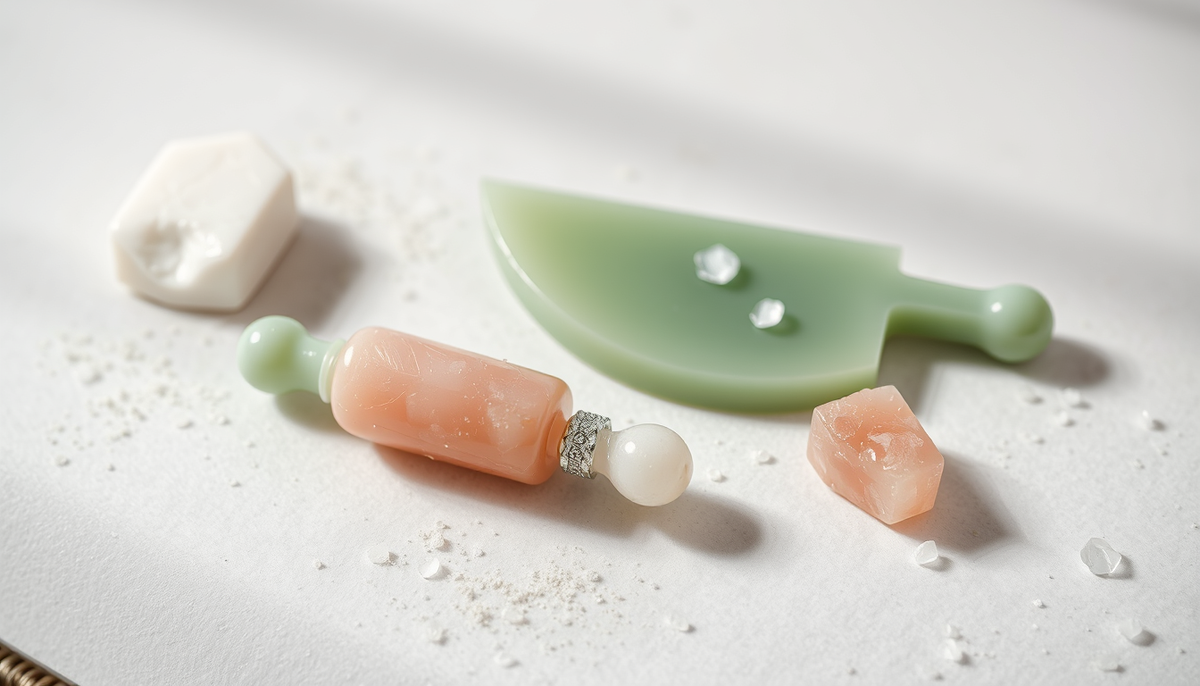
- Jade and rose quartz are common materials. Jade is typically cooler and denser, offering a steady glide; rose quartz is widely used and often lighter with a softer feel. Choose a tool that feels comfortable in your hand and presents a smooth, flat surface with no chips.
- Consider tool shape and edge width: a broader edge can cover larger areas (forehead, cheeks) while a smaller edge is useful for around the nose and under-eye regions.
-
Stroke cadence and technique
- Maintain a gentle to moderate pressure. The goal is to feel drainage and lifted skin, not pain.
- Angle the tool around 15–30 degrees relative to the skin for a smooth glide.
- Move from the center of the face outward toward lymphatic drainage zones (jawline, neck) with long, sweeping strokes.
- Common cadence: 6–12 strokes per zone, each stroke lasting 2–4 seconds. Avoid dragging or pulling the skin; use light to moderate pressure with consistent motion.
- Aim for a total routine of about 5–7 minutes when starting, gradually increasing up to 10 minutes as you grow more comfortable.
-
Post-care
- Rinse or wipe the face to remove excess oil and any relocated fluids.
- Moisturize and, if daytime, apply sunscreen to protect fresh skin after massage.
- Hydrate well after sessions; adequate hydration supports lymphatic function.
Visual reference and practical cues are included below to help you visualize the workflow, including illustrations of stroke paths and a simple at-home routine.
Tool selection: Jade, Rose Quartz, and beyond
Choosing the right gua sha tool depends on your skin type, comfort, and goals. Here’s a quick comparison to help you decide:
: Heavier and cooler, jade tends to retain a consistent surface temperature, offering a reliable glide for larger facial surfaces like the forehead and cheeks. It’s a popular option for beginners seeking a steady, predictable feel. - Rose Quartz: Typically lighter with a slightly softer grip, rose quartz is a common, approachable choice that many find comfortable for daily use. It often features a rounded edge suitable for broader strokes.
- Metal or other materials: Some tools use copper or other metals for their smooth finish and cooling properties. If you have sensitive skin, test how your skin responds to different metals and surfaces and clean thoroughly between uses.
Maintenance tips:
- Clean the tool after every use with mild soap and warm water; dry completely to prevent water spots or corrosion (if applicable).
- Avoid dropping or banging the tool to prevent chips or cracks.
- Store in a clean, dry place to keep the surface smooth and free of contaminants.
Stroke cadence and technique: practical guidelines
Honing your technique is essential for consistent results and safety. Use the following practical guidelines as a baseline, then adapt to your comfort level:
- Always glide from the center of the face outward toward the boundaries of the jaw and neck.
- Begin with the forehead, then move to the under-eye area, cheeks, jawline, and neck in a logical flow that follows lymphatic pathways.
- Keep strokes slow and controlled; avoid rushing through areas or applying sudden pressure changes.
- Focus on creating a gentle lifting effect rather than pushing hard, which can irritate the skin.

Illustrative diagrams can help you visualize paths. The following SVG illustration demonstrates a typical path from the center of the face outward and downward toward the jawline and neck.

Expected results: what you can realistically achieve
Many users report an immediate look of reduced puffiness and a subtle glow after the first session, especially when combined with proper hydration and skincare. Over time (2–4 weeks of regular use), you may notice:
- More defined jawline contours and softened nasolabial folds for some individuals
- Improved skin tone and a brighter complexion from enhanced microcirculation
- A sense of smoother skin texture and a relaxed facial appearance
Important caveats:
- Results vary by individual and depend on factors like skin type, sensitivity, and consistency.
- If you notice persistent redness, irritation, or bruising, reduce pressure, extend rest periods, or discontinue use until skin recovers.
A quick 5–7 minute at-home routine you can start today
- Cleanse and dry your face; apply a light moisturizer or oil.
- Forehead: use a broad edge and glide from the center of the forehead toward the temples; repeat 6–8 times.
- Glabellar area (between eyebrows): light, upward strokes away from the brow bone; 4–6 strokes.
- Under-eye and cheek: small, gentle strokes from the inner corner outward toward the temples; 4–6 strokes per area.
- Cheek and mid-face: sweeping motions from the center of the face outward toward the ears; focus on lifting lines toward the jawline; 6–12 strokes per side.
- Jawline and neck: move from chin along the jawline to the ear; then a few upward strokes along the neck toward the jaw, to encourage drainage; 6–10 strokes per area.
- Finish with a light cleanse and apply moisturizer or sunscreen if daytime.
Sponsored shopping notes: optimizing your toolkit with LovA Body
For readers interested in pairing this protocol with high-quality tools, LovA Body offers a curated selection of gua sha tools. You can explore options described as ideal for facial lymphatic drainage and everyday use. Shop LovA Body jade and rose quartz gua sha tools to find the form and weight that best suit your hand and routine. Note: some links in this article are affiliate/sponsored.
To further support your routine, consider keywords like jade gua sha tool and rose quartz gua sha tool when browsing. These tools are designed to maximize glide and uniform contact with the skin, helping you adhere to the cadence outlined above.
Disclaimer: Some links are sponsored or affiliate. If you purchase through these links, I may earn a small commission at no extra cost to you. Your support helps keep content free and accessible.
Safe practices and contraindications
Gua sha is generally safe for healthy skin when performed correctly. Always err on the side of gentleness if you’re new to the technique. Consider the following safety guidelines:
- Avoid breaks in the skin, active acne with open lesions, sunburn, dermatitis, or infections in the treated area.
- Do not use gua sha on areas with recent surgical scars or broken capillaries without medical advice.
- Discontinue if you experience persistent redness, irritation, bruising, or increased sensitivity; reassess pressure and frequency.
- Consult a dermatologist if you have rosacea, eczema, or other chronic skin conditions before starting gua sha.
- Be cautious around the neck’s carotid region and thyroid area; keep strokes gentle and avoid heavy pressure there.
With thoughtful use, gua sha can be a supportive addition to your skincare routine—not a substitute for medical care when needed.
Illustrations and visuals to guide your practice
In addition to the image above, the diagrams embedded here illustrate the general stroke paths and the idea of fluid drainage toward the lymph nodes. Use these references to refine your technique, then personalize your routine based on how your skin responds.
Illustration alt text: Line drawing showing major stroke paths for gua sha on the face with arrows pointing toward the jawline and neck.
Another quick reference image: 
Closing thoughts
Gua sha at home can be a valuable, science-informed addition to your skincare routine when performed with proper technique and safety. Start slowly, listen to your skin, and adjust pressure, duration, and frequency as needed. When paired with high-quality tools and a thoughtful routine, gua sha can contribute to a calmer appearance, reduced puffiness, and a healthy, natural glow.

Lämna en kommentar
Denna webbplats är skyddad av hCaptcha och hCaptchas integritetspolicy . Användarvillkor gäller.